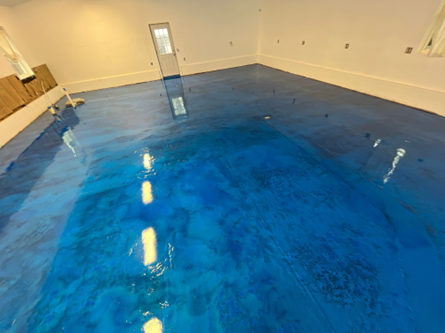
The 5 Basic Steps for Placing an Epoxy Floor
By Mallory Westbrook
Introduction:
Epoxy floors are known for their durability, chemical resistance, and easy maintenance. They are a popular choice for industrial and commercial facilities like warehouses, hospitals, and car dealerships. However, epoxy flooring installation requires careful preparation and execution, or else you might end up with an uneven, cracking, or peeling floor. To help you achieve a successful epoxy floor installation, here are the five basic steps you need to follow:
Step 1: Surface Preparation
One of the most critical steps in epoxy flooring installation is surface preparation. You need to ensure that the floor is clean, dry, and free from dirt, dust, oil, and other contaminants that can interfere with the adhesion of the epoxy. The surface should also be smooth and level with no cracks or spalling. The preparation process involves removing any existing coating or sealant, cleaning the floor with a degreaser, patching any defects with a filler, and grinding or shot blasting the surface to create a rough texture (or surface profile) that enhances the epoxy’s grip. The moisture gradient of the floor should be measured by a qualified professional to help determine the appropriate epoxy and primer.
Step 2: Mixing the Epoxy
Once the floor is ready, you need to mix the epoxy resin and hardener according to the manufacturer’s instructions. The mixing ratio is crucial to achieving the desired strength, curing time, and chemical resistance of the epoxy. You can use a drill mixer or a paddle to ensure that the two components are thoroughly combined. Do not over-mix or whip up the epoxy, the entrapped air you create in the bucket is something you will need to contend with on the floor.
Step 3: Applying the Epoxy
After the epoxy is mixed, you should immediately pour (in ribbons) onto the floor in small sections using a squeegee or roller. You need to work quickly but carefully to ensure that the epoxy is evenly spread, without leaving any puddles or ridges. Most epoxies have a ‘pot-life’ or amount of time that can be kept in a bucket. As you start to approach the end of the ‘pot-life’, the epoxy can start heating up in and in some cases start smoking. You can also add some decorative flakes or pigments to the epoxy to enhance its appearance. Once the first coat is applied, you need to wait for the recommended hardening time, which can range from a few hours to overnight, depending on the type and thickness of the epoxy and whether an accelerator was used.
Step 4: Applying the Topcoat
After the first coat has cured, you will need to sand the surface lightly to remove any bumps or drips and create a smooth surface for the topcoat. Then, you can apply the second coat of epoxy, which is called the topcoat or clearcoat. The topcoat provides extra protection against wear, stains, and UV damage and enhances the gloss and color of the floor. You need to follow the same application process as the first coat, including waiting for the recommended drying time.
Step 5: Finishing and Maintenance
After the topcoat is dry, you can add some finishing touches like stripe painting or safety markings. You should also avoid exposing the floor to heavy traffic or moisture for at least 24-48 hours to allow the epoxy to cure fully. Once the floor is ready for use, you need to maintain it properly by cleaning it regularly with a neutral detergent and warm water, avoiding harsh chemicals or abrasives, and repairing any damage or wear as soon as possible.
Conclusion:
Placing an epoxy floor requires attention to detail, patience, and skill. By following the five basic steps of surface preparation, mixing the epoxy, applying the epoxy, applying the topcoat, and finishing and maintenance, you can achieve a high-quality and long-lasting epoxy floor that meets your specific needs and preferences. Whether you are an engineer, a contractor, or a DIY enthusiast, mastering these steps can help you offer superior flooring solutions to your clients or elevate your own property’s aesthetics and functionality. Happy epoxy flooring!
